Documentation Index
Fetch the complete documentation index at: https://lovable.generaltranslation.app/llms.txt
Use this file to discover all available pages before exploring further.
Why Clerk?
- Secure sign-in & sign-up (social, password, MFA)
- Prebuilt UI components: user profiles, org management, impersonation
- Support for B2B apps (teams, roles, invitations)
- Integration with Supabase, Stripe (coming soon), and more
- Waitlist mode to manage early access
- Generous free tier: 10K MAUs
Step-by-step integration guide
Here is a step-by-step guide:
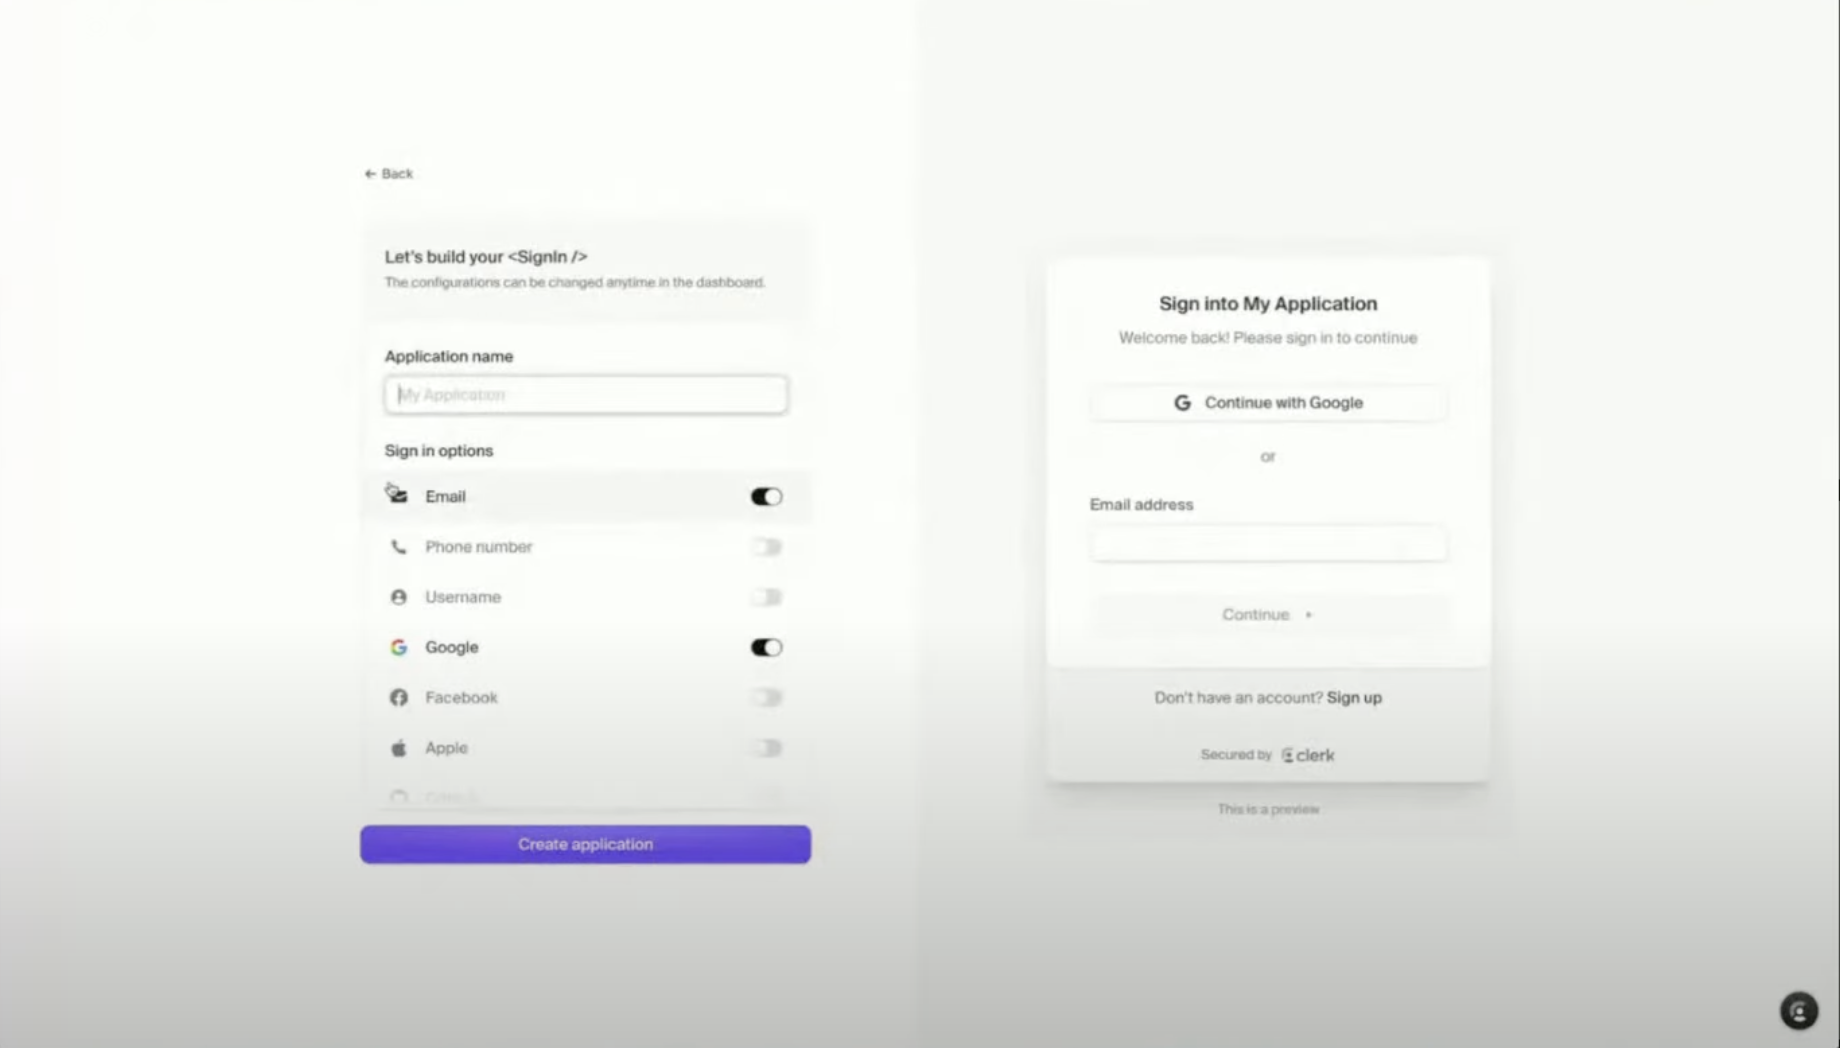
Set Up Your Clerk App
Step 1
Create a Clerk Account → Clerk.com

Step 3
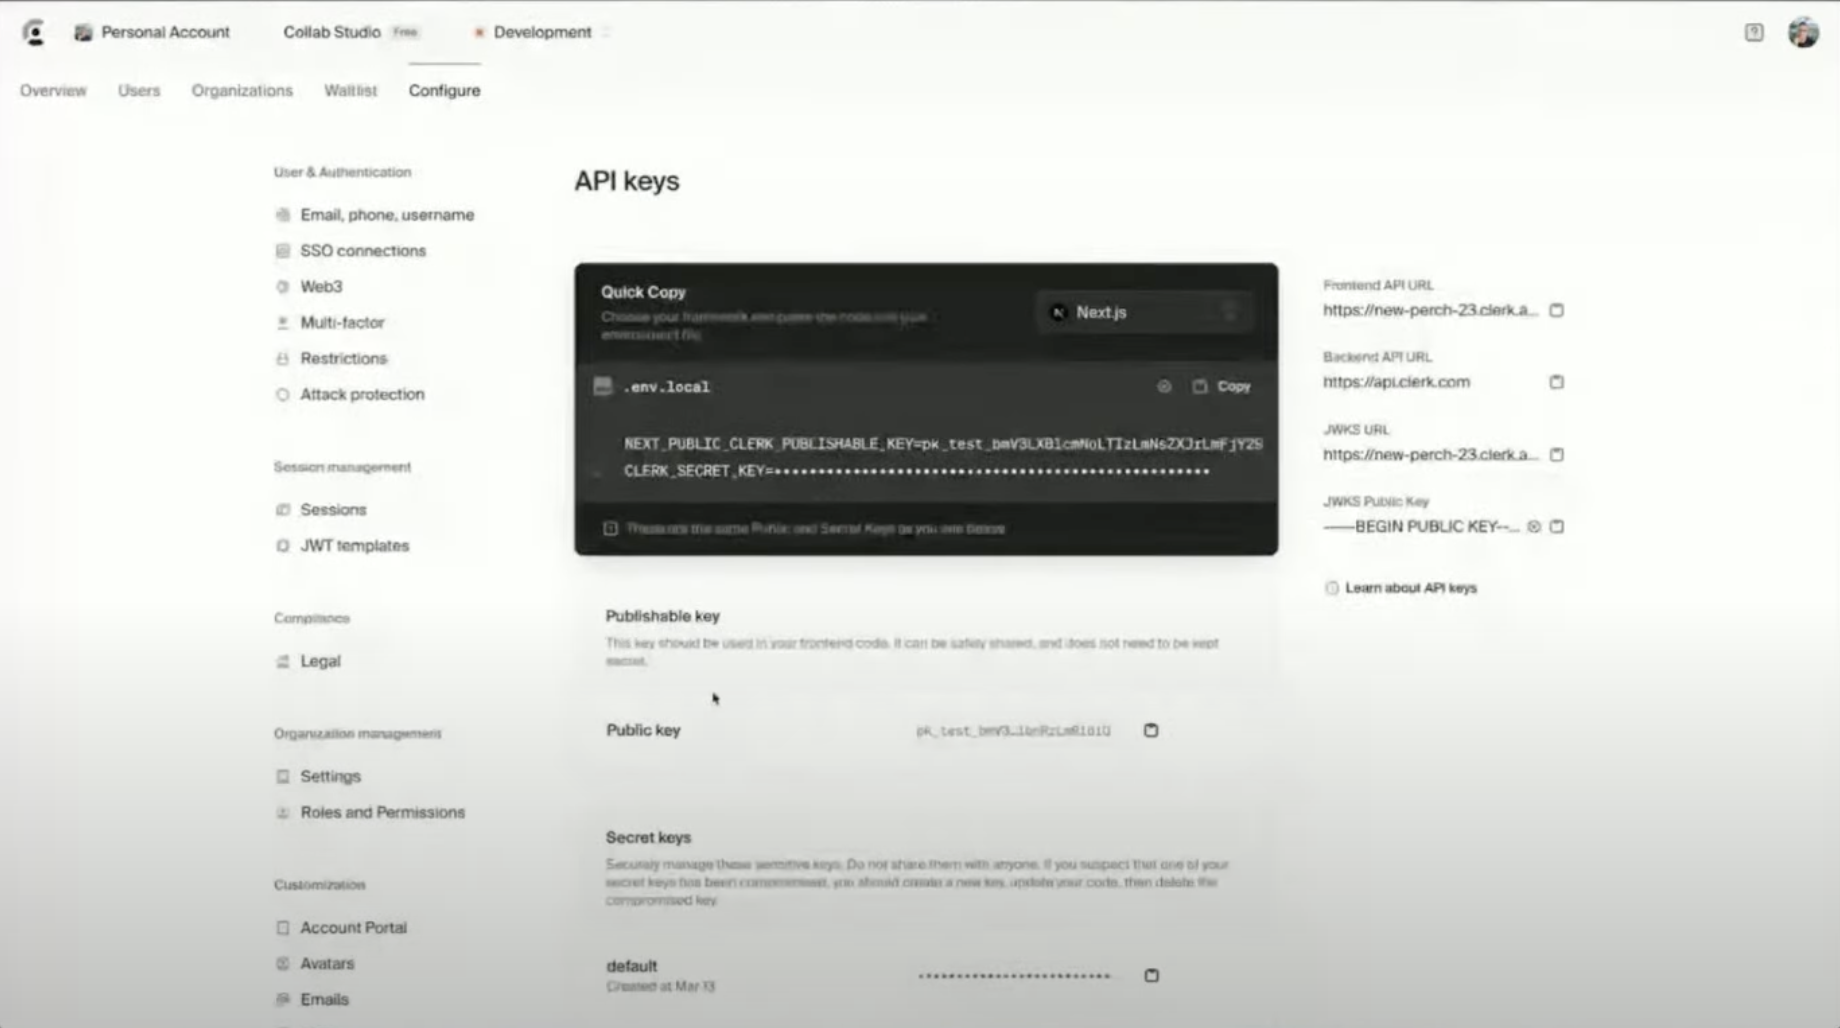
Add Clerk to Your Lovable App
Step 1
In Lovable, add Clerk as your authentication provider.Prompt Lovable: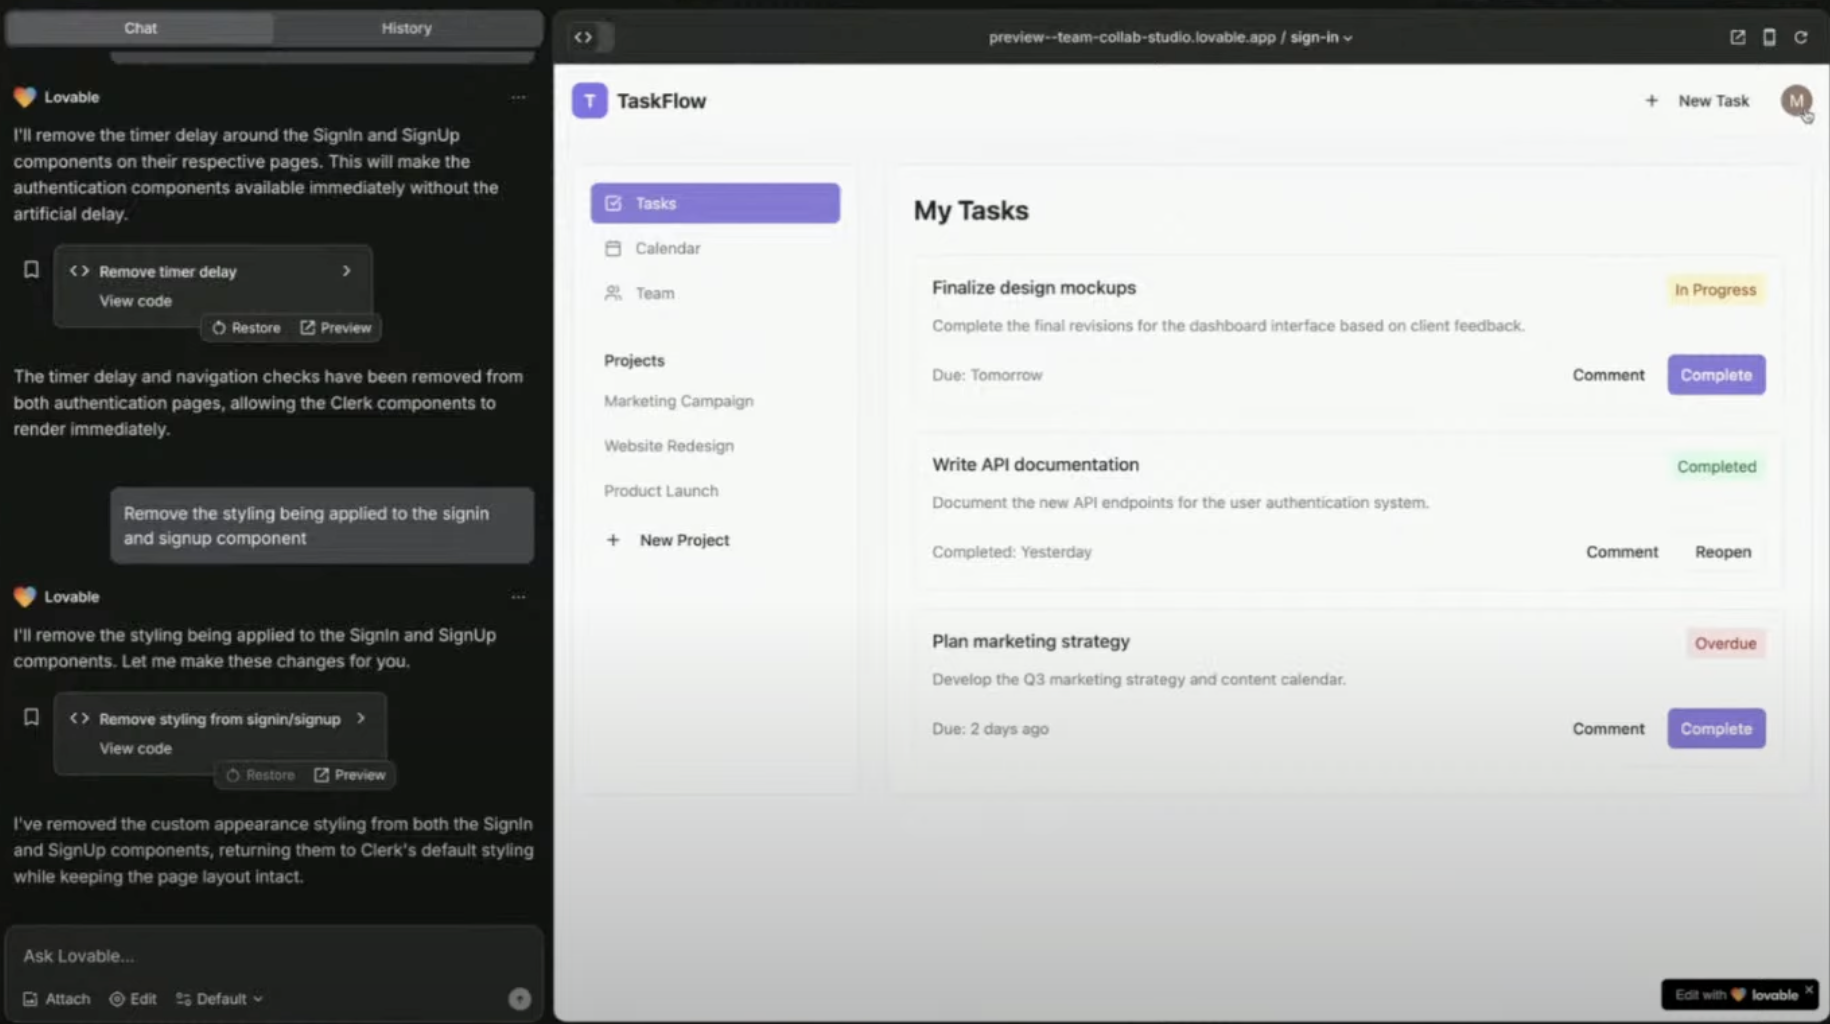
Let’s build a beautiful project and task management app in the style of Asana. Users should be able to login and signup using Clerk for authentication and user management. Let’s start by building a great looking homepage and use Clerk’s waitlist component to let users join while we build the rest of the app.
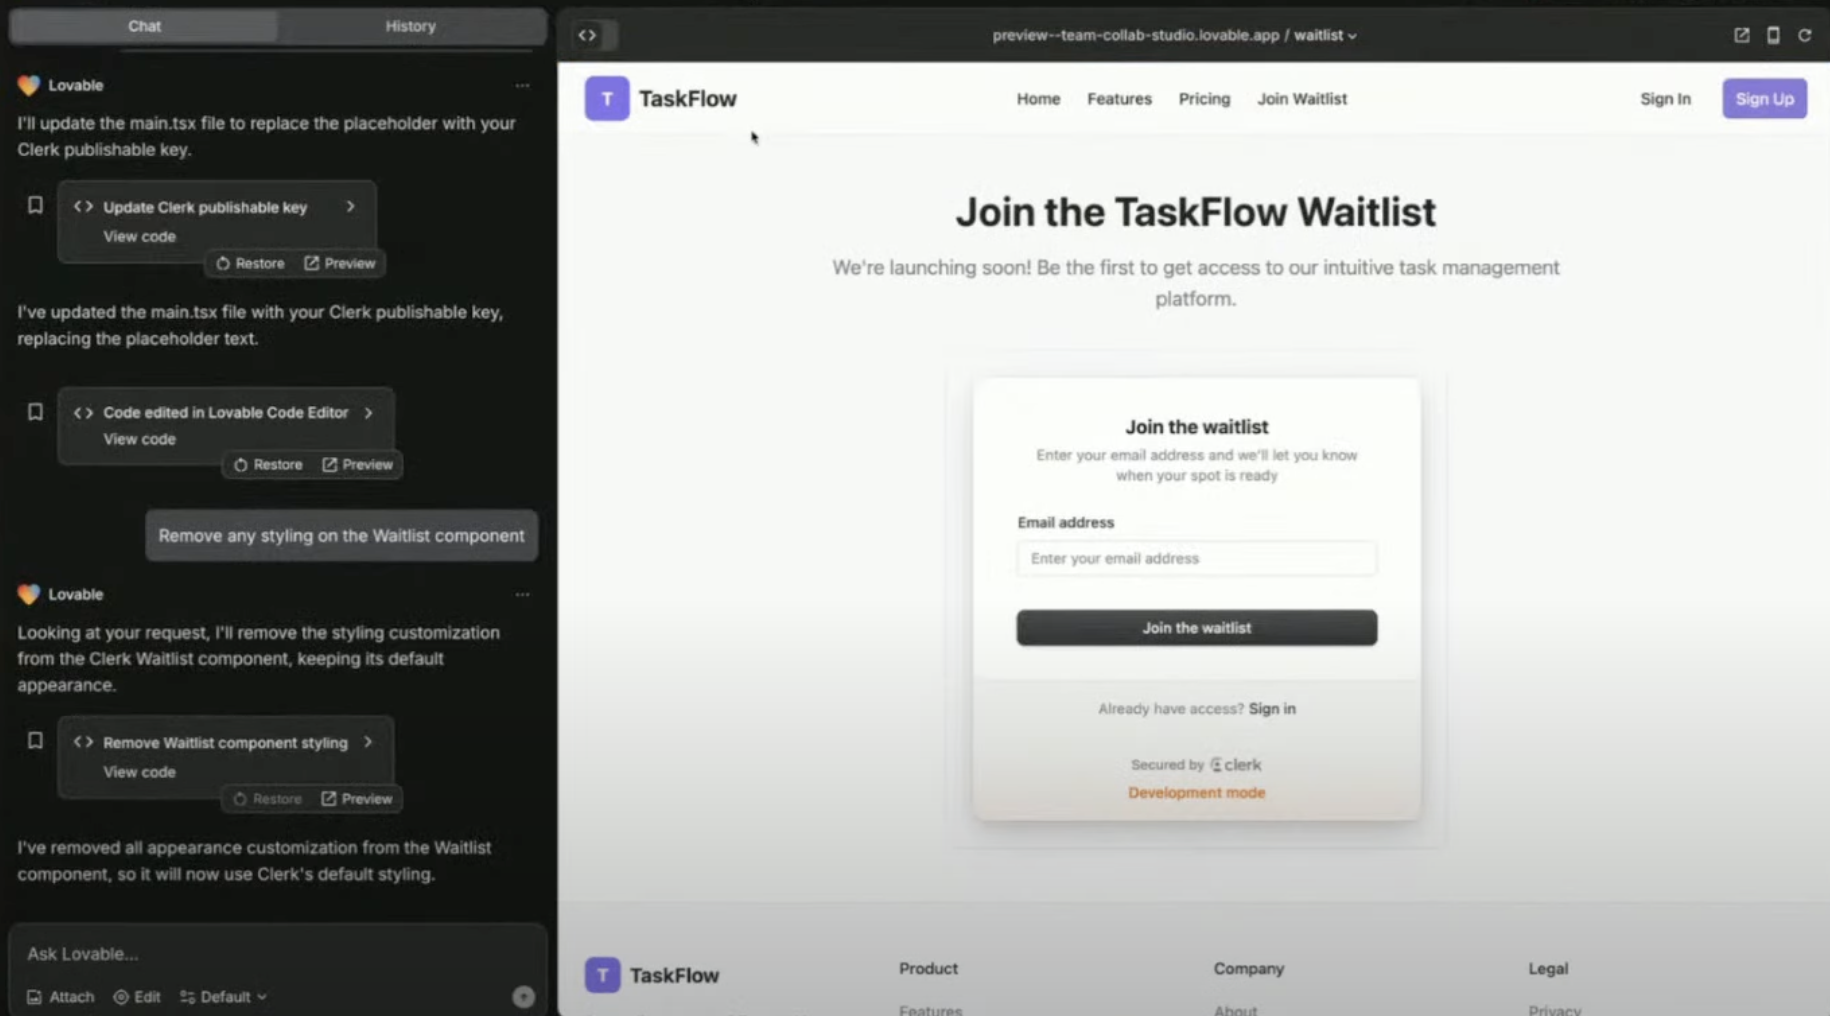
Activate Waitlist Mode (Optional)
Why use a waitlist? – Gather early users before launching your app!
Managing Users & Teams in Clerk
Set up team-based access in your app.
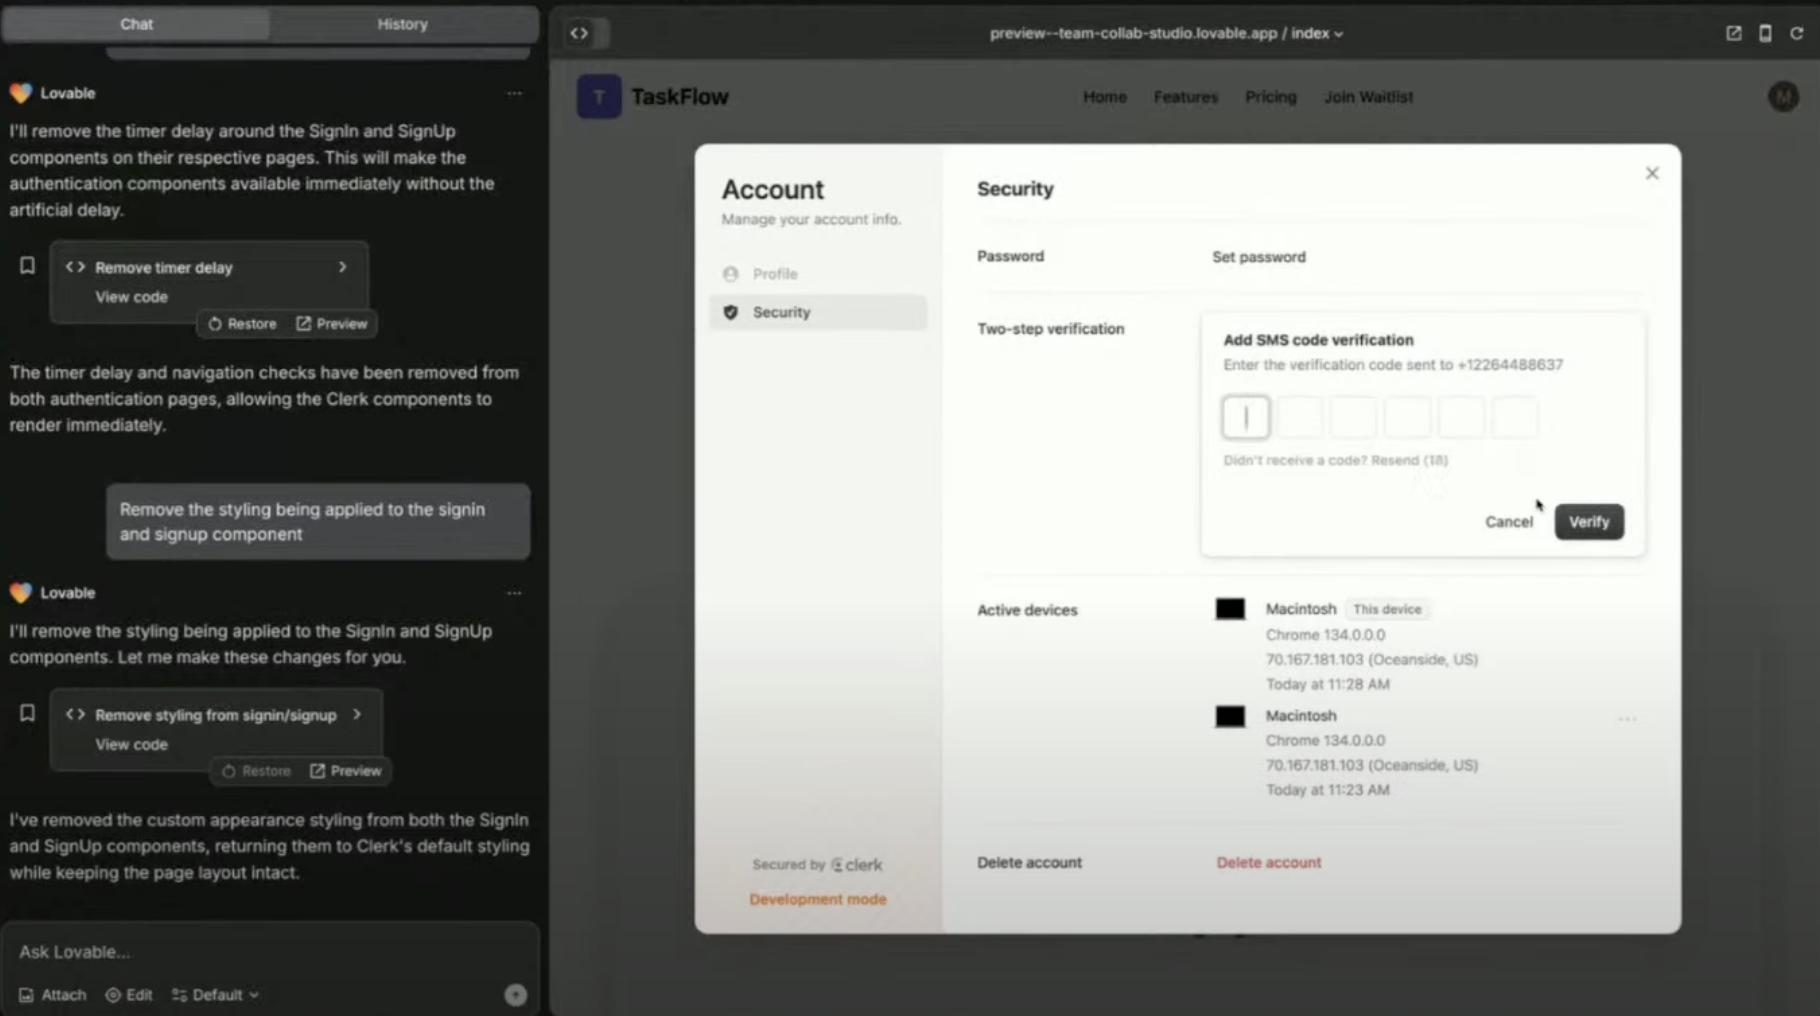
Using Clerk’s User Profile Component
- Provides a prebuilt user management dashboard
- Supports social logins & password authentication
-
Users can manage their own accounts & 2FA
Integrate with Supabase (Advanced)
Combine Clerk Auth with Supabase backend.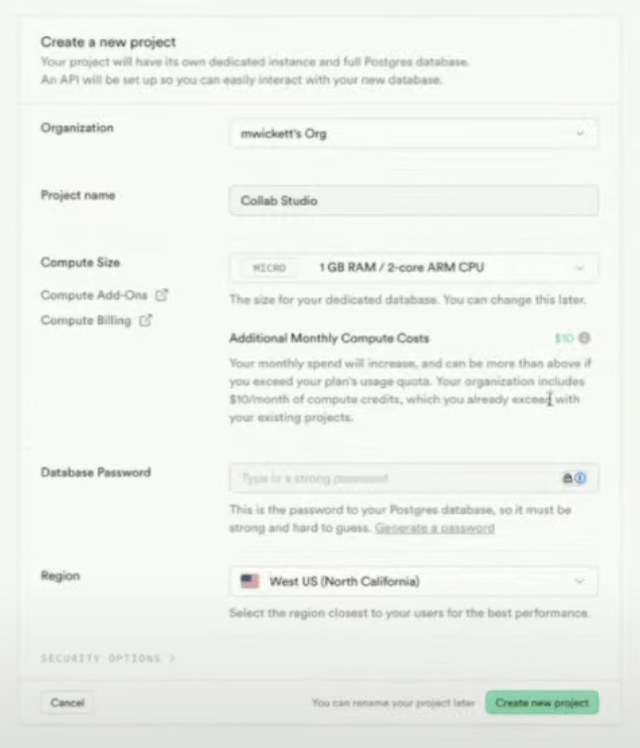
Why integrate with Supabase?
- Store user data in a database
- Secure authentication with JWT tokens
- Connect authentication to app features
Step 1

Step 3
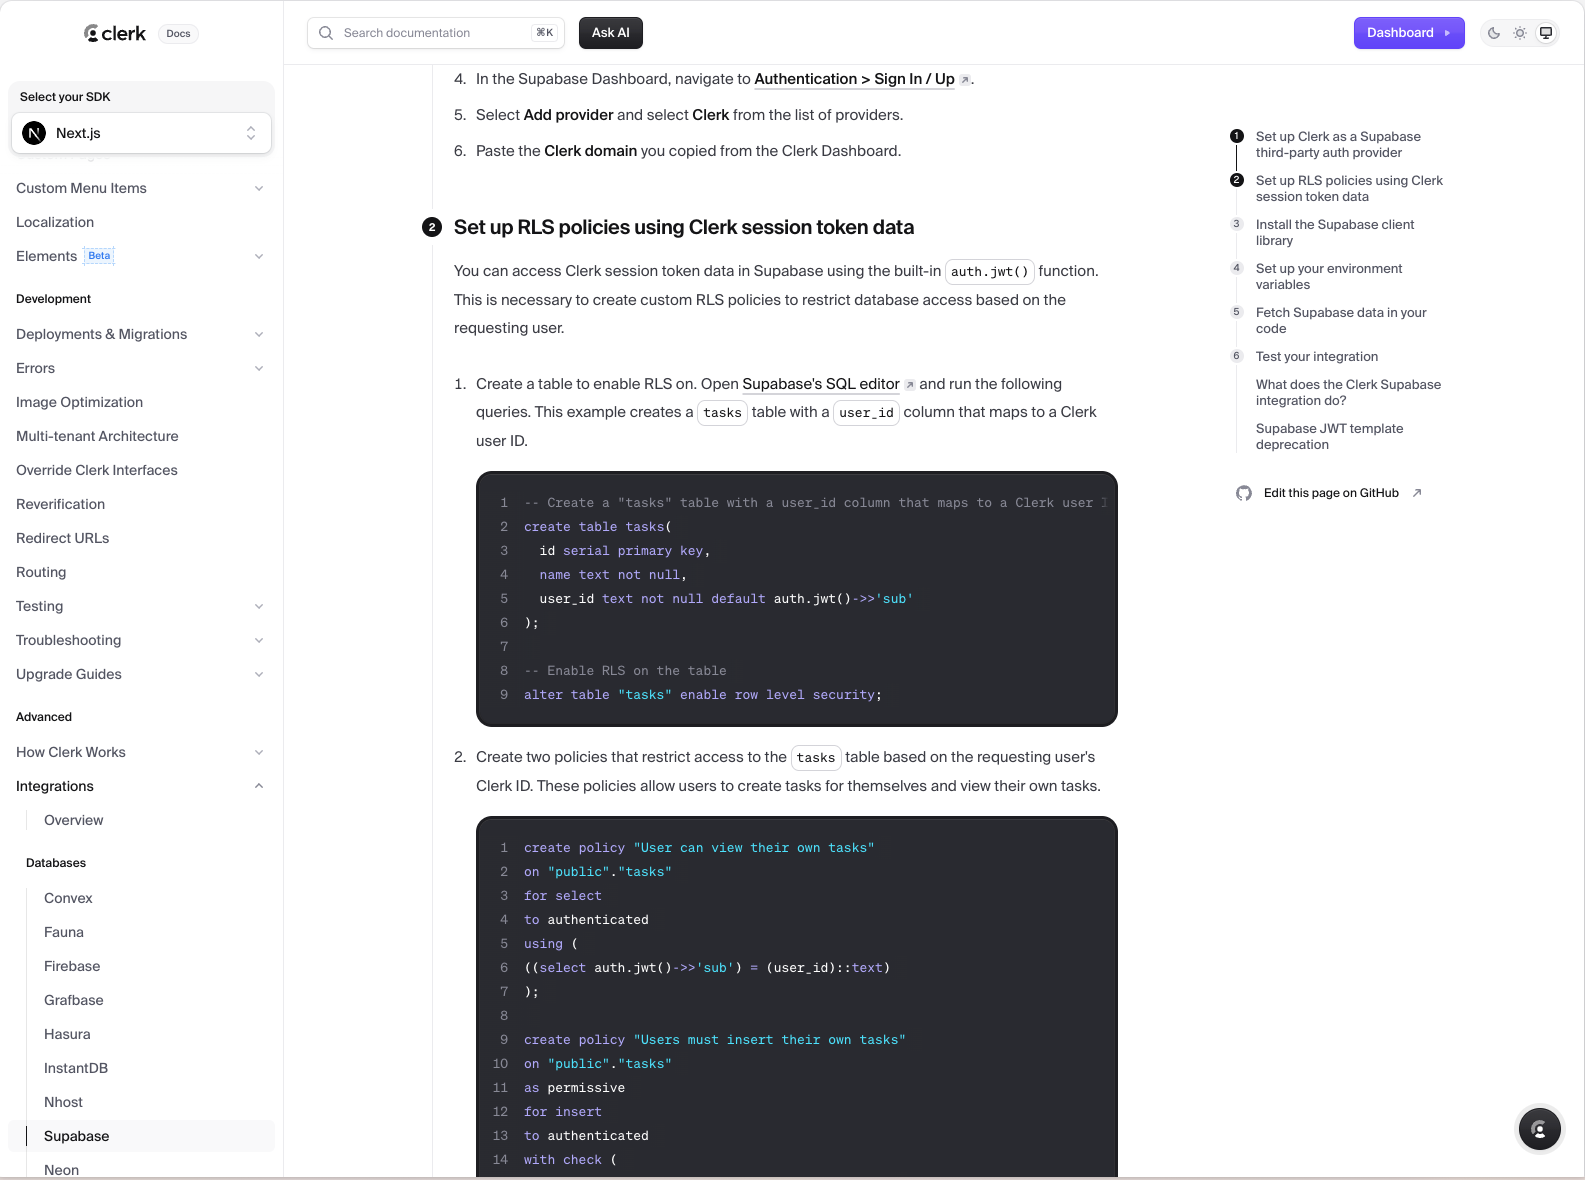
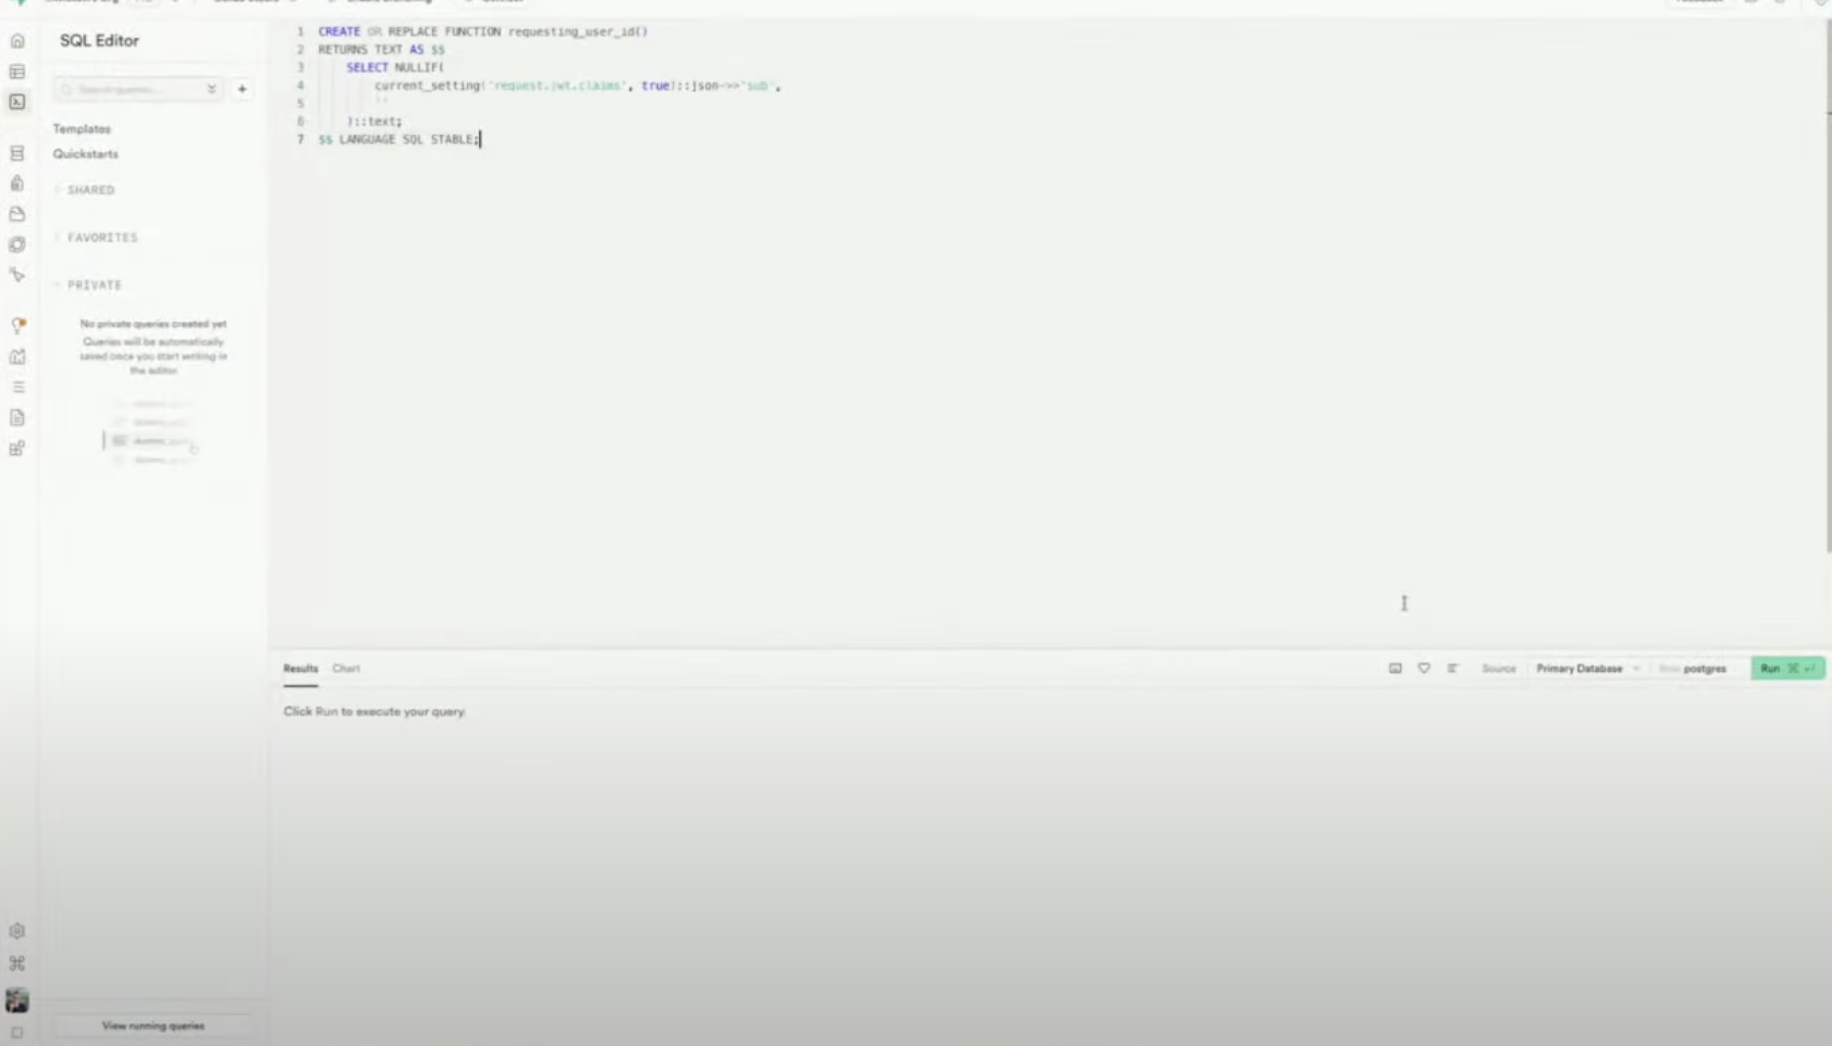
Enable Clerk as an authentication providerUpdate RLS policies to use
auth.uid() from ClerkPrompt Lovable to:Let’s setup supabase to integrate with Clerk. Clerk has been configured with a Supabase secret. Here’s an example of implementing the supabase client using Clerk. Use this as a reference.[Supabase client configuration import]
Add a Custom Domain (Optional)
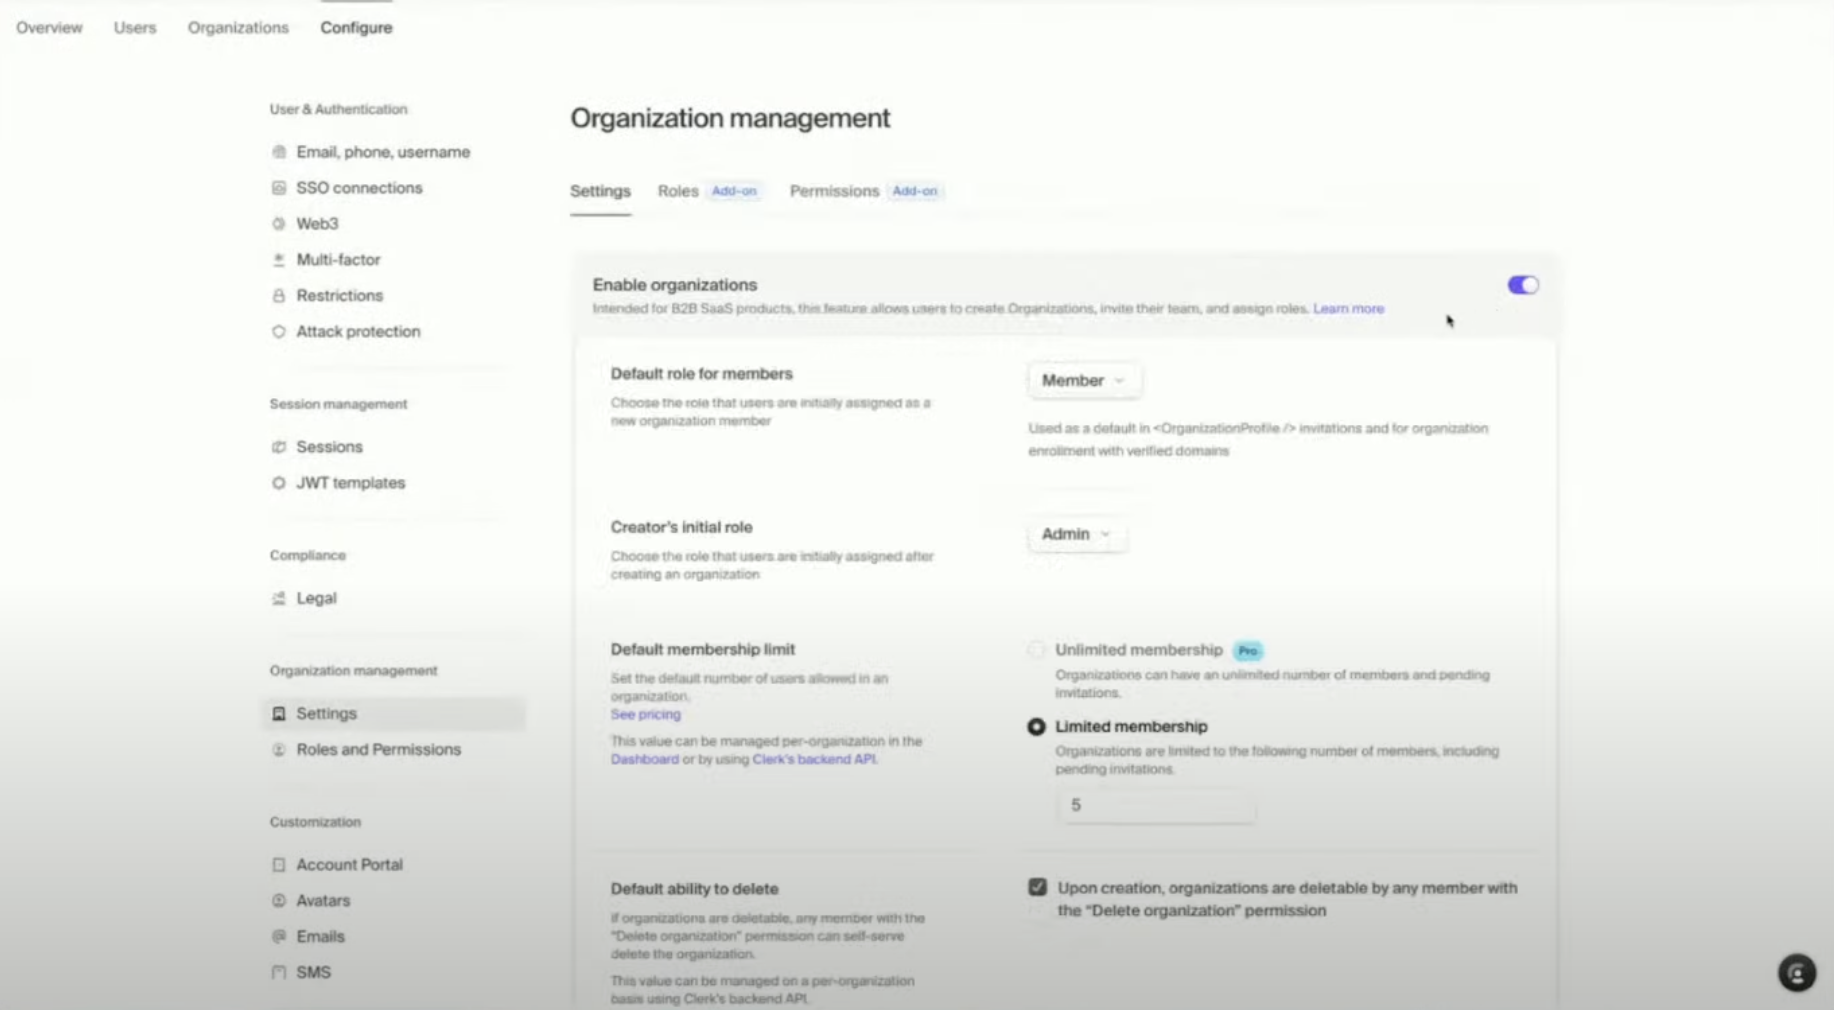
Bonus: Build B2B features in minutes
Clerk supports:- Role-based access for organizations
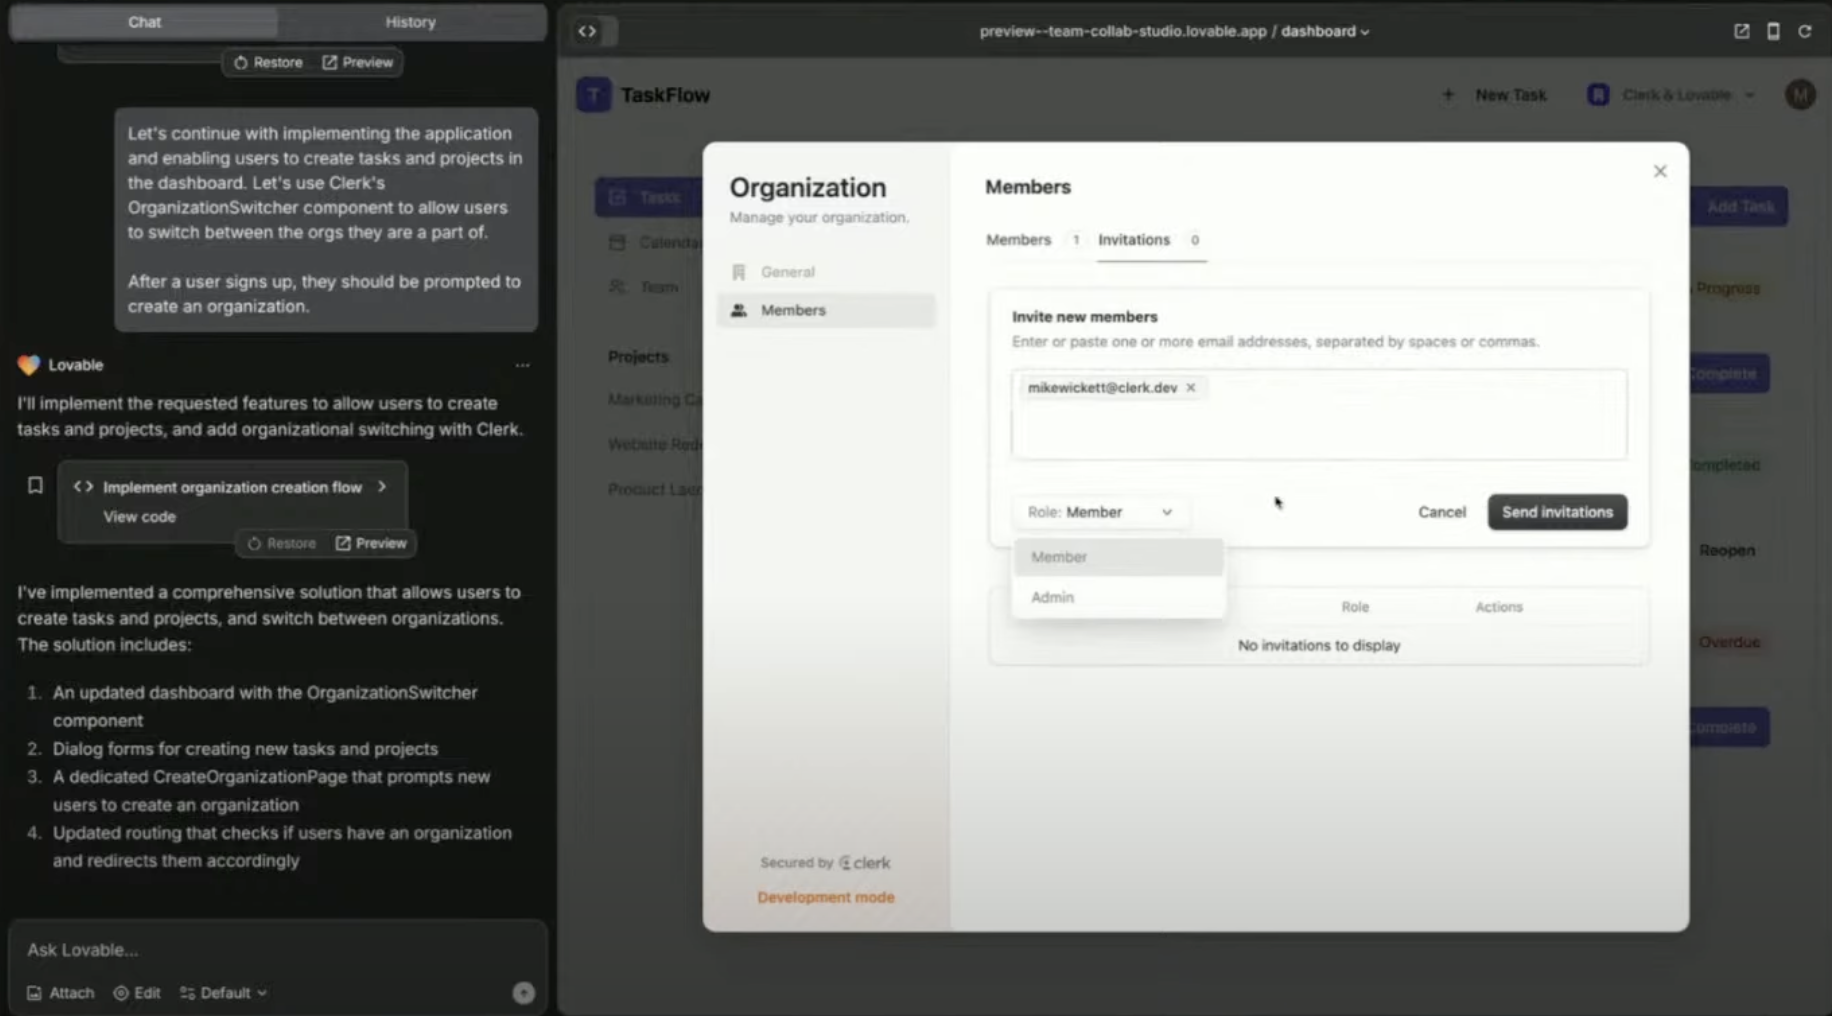
- Invite flows (email-based, pre-built UI)
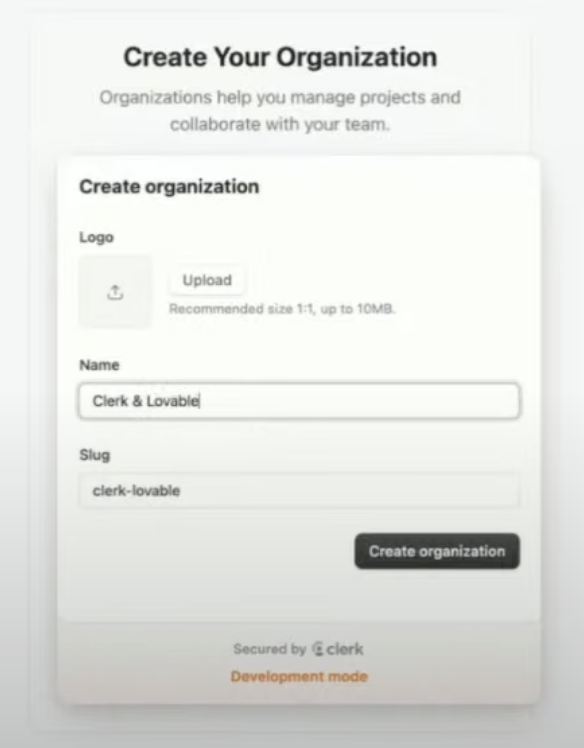
- Organization profile customization (logo, name)
- Multi-org switching (e.g. Slack-style)
Add organization switcher UI
Let users invite teammates
Tips & troubleshooting
- Already using Supabase Auth? You can switch to Clerk without rewriting your app logic. Just configure JWT correctly and swap auth provider.
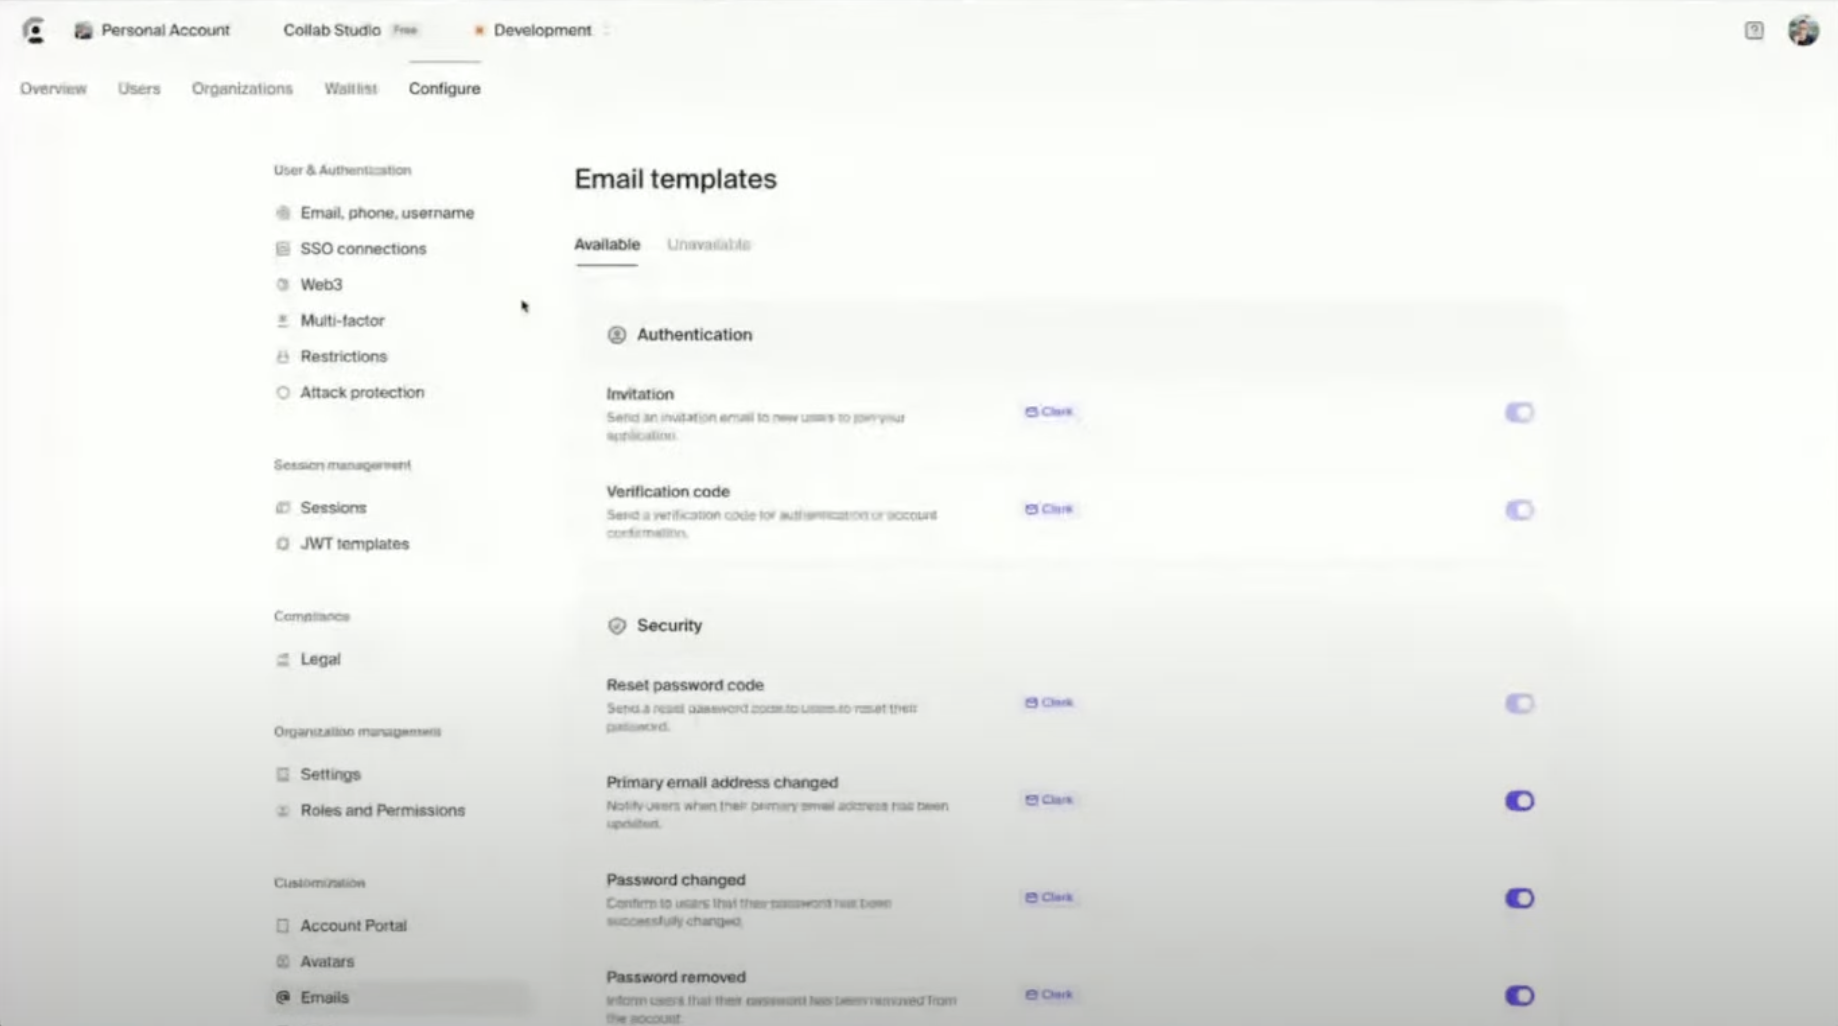
- Email customization: Clerk lets you edit all transactional email templates (waitlist, invitations, approvals).
- Mobile login: Clerk supports passkeys, OTP, and SMS — no extra config needed in Dev Mode.
- Compliance: Clerk is SOC2, HIPAA, and GDPR compliant.
Frequently Asked Questions (FAQ)
Can I switch from Supabase Auth to Clerk easily?
Can I switch from Supabase Auth to Clerk easily?
Yes. Clerk and Supabase work well together. You just need to:
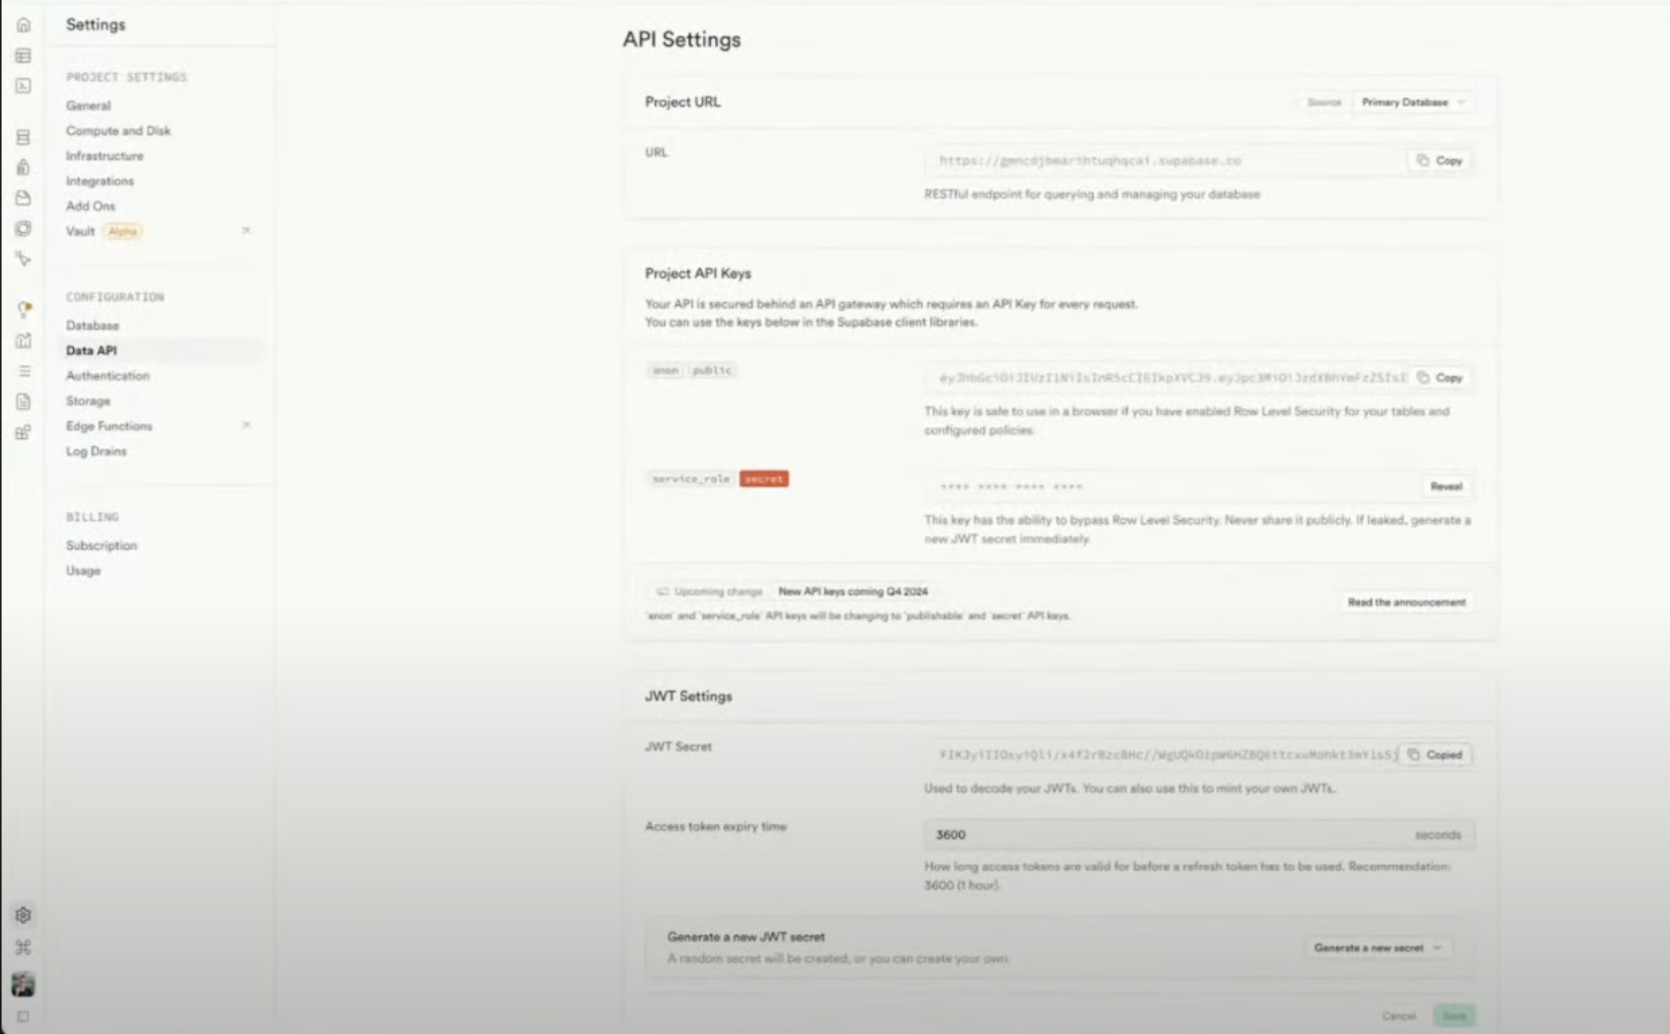
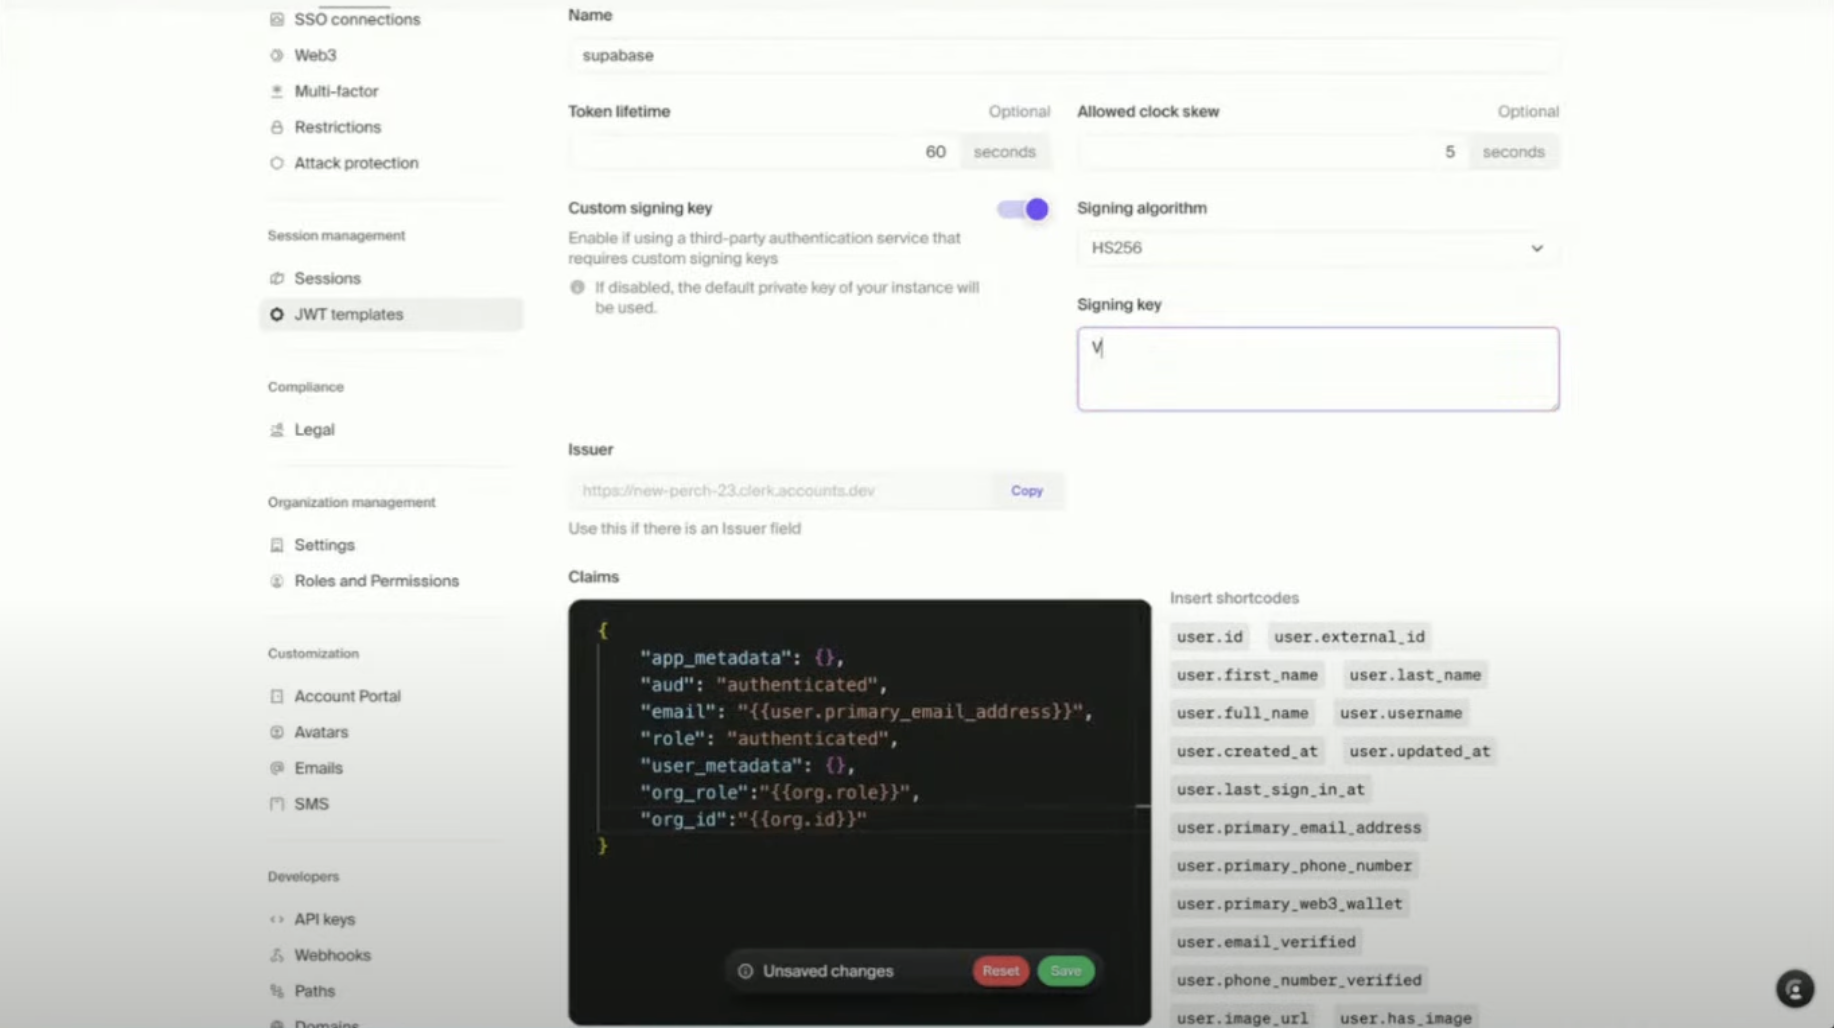
- Set up Clerk to issue JWTs
- Add Supabase’s JWT secret in Clerk
- Update Supabase RLS policies to use Clerk’s
auth.uid()
Do I need to configure OAuth providers like Google or GitHub?
Do I need to configure OAuth providers like Google or GitHub?
Only for production. In development mode, Clerk provides shared credentials for testing. For production:
- Set up your own Google/GitHub/etc. credentials
- Add them in Clerk under OAuth settings
What’s the difference between Organizations and Users?
What’s the difference between Organizations and Users?
- Users: Individuals who can log in to your app
- Organizations: Groups of users (teams, companies)
- Role-based access (Admin, Member, etc.)
- Users to invite teammates
- B2B SaaS-style flows
What is “Impersonation Mode”?
What is “Impersonation Mode”?
It allows admins to log in as any user — super helpful for:
- Debugging user issues
- Understanding their experience
- Providing live support
Clerk limits what impersonators can do (e.g., no password changes).
Can I customize Clerk's UI components?
Can I customize Clerk's UI components?
Yes. Clerk offers:
- Full CSS support via
appearanceprops - The option to build fully custom UIs using Clerk React hooks
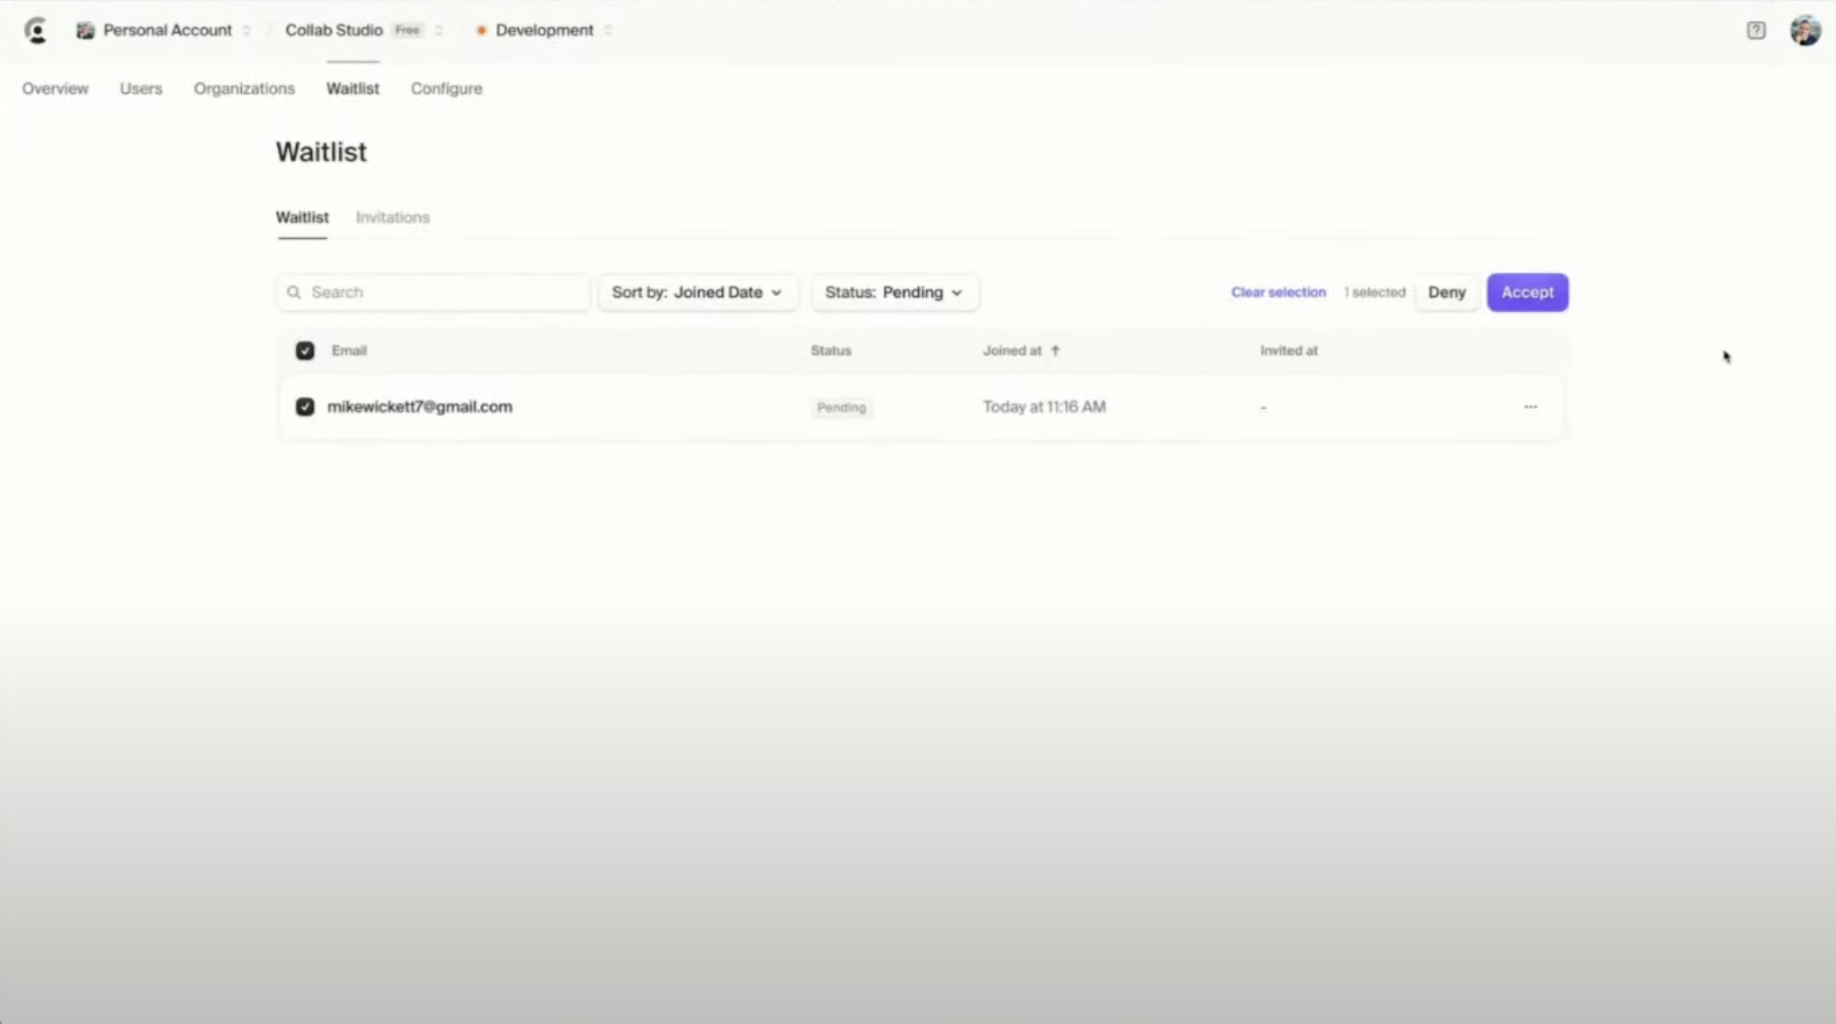
Can I email my waitlist users from Clerk?
Can I email my waitlist users from Clerk?
Currently:
- Users are auto-notified when approved from the waitlist
- Bulk email support is coming soon
Is Clerk free to use?
Is Clerk free to use?
Yes! Clerk has a generous free tier:
- Up to 10,000 Monthly Active Users (MAUs)
- Paid plans start at $25/month, with usage-based pricing after
Does Clerk support compliance (SOC2, HIPAA, GDPR)?
Does Clerk support compliance (SOC2, HIPAA, GDPR)?
Yes. Clerk is:
- SOC 2 certified
- HIPAA-compliant
- GDPR-ready
Can I use Clerk with Stripe for billing?
Can I use Clerk with Stripe for billing?
Coming soon. You’ll soon be able to:
- Define plans (e.g. Free, Pro, Enterprise)
- Let users/orgs manage subscriptions from Clerk’s UI
- Automatically sync data to Stripe
Final thoughts
Clerk turns authentication into a prompt. You don’t need to build it yourself. With just a few clicks and prompts, your app now has:- Secure, scalable authentication
- Team & organization management
- Impersonation tools for debugging
- Supabase-backed data and access control
- Custom domain support for a polished UX